Here are all the steps you need to know to build a campaign on the Readpeak platform.
Campaign name
Begin by setting a name for your campaign. This name will be visible on your invoice, so make sure it accurately represents your campaign.
Campaign currency
Choose the currency you’d like to use for this campaign. Once set, the currency cannot be changed after the campaign is created, so choose wisely.
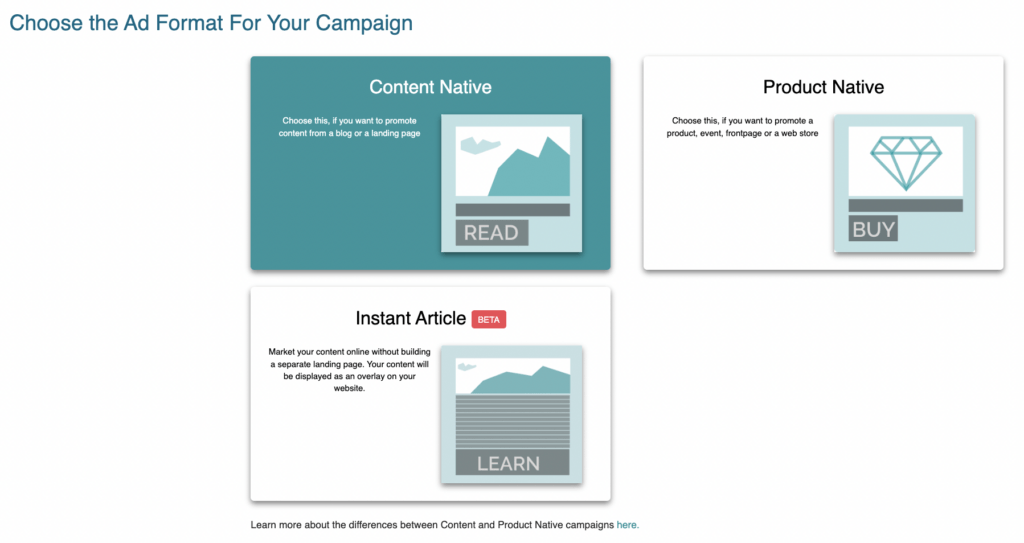
2. Select ad format
Choose the ad format that best suits your campaign objectives. Need more information about each ad format? Check out our comprehensive guide for detailed explanations and examples.
Content native
Ideal for promoting blog articles, landing pages, or other content-focused materials.
Product native
Perfect for showcasing products or services within native ad placements.
Instant article
Explore innovative ways to drive high engagement to your website, even without a URL or landing page.
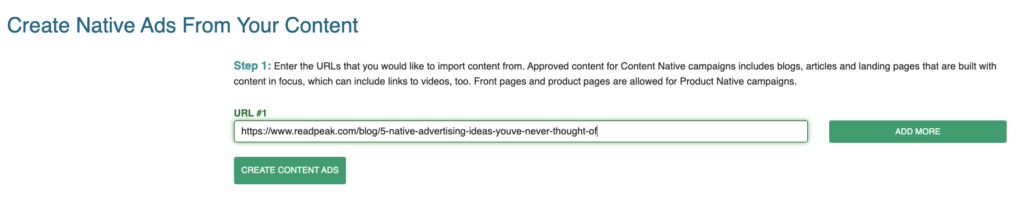
3. Add/edit landing pages and URLs
Choose the ad format that best suits your campaign objectives. Need more information about each ad format? Check out our comprehensive guide for detailed explanations and examples.
Enter URLs
Enter the URLs you’d like to import content from.
Approved content for Content native campaigns includes blogs, articles, and landing pages focused on content, which can also include links to videos.
Front pages and product pages are allowed for Product native campaigns.
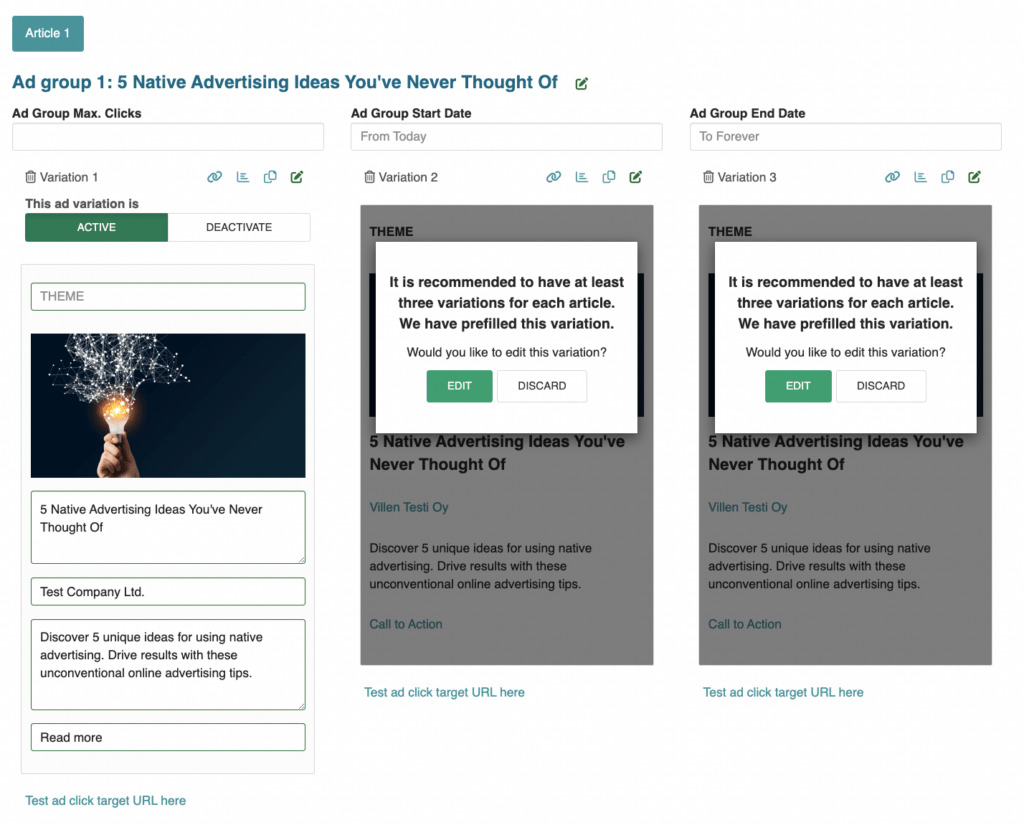
Create ad variations
The platform generates one ad variation based on the content from the landing page.
If you want to add more creatives, you can add as many variations as you like for your Readpeak campaign.
We recommend adding at least 3-5 variations per article.
4. Edit flight times and manage your ad group
Adjust flight times
Set the flight times for your ad group by specifying the desired number of clicks or the start and end dates for your ads.
Add trackers
Enhance your campaign tracking by adding impression pixels and click tags to monitor performance.
Duplicate and preview creatives
Easily duplicate your ads within the ad group to create variations, and preview them to ensure they meet your campaign goals before going live. These actions help you fine-tune your campaign and optimize its effectiveness.
5. How to add click tracker
Adding click trackers
Once your ads are created, you can enhance tracking by adding click trackers and impression pixels. Simply locate the “edit click target URL” button over your ads.
Add click tag tracking URL
Add the click tag tracking URL to the “click target URL” field. This will redirect the user to the specified URL.
Dynamic tokens for click trackers
You can add dynamic tokens in click URLs to get more specific information with each click.
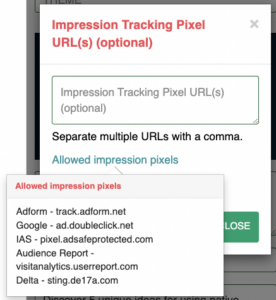
Impression pixel/ tracking
Place the URL of the impression tracking pixel directly into the “Impression Tracking Pixel” field. Do not place the whole tag, only the URL link.
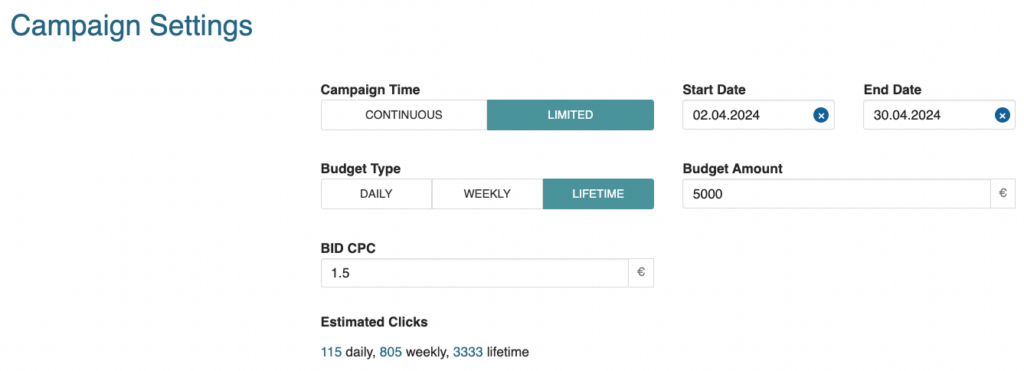
6. Campaign settings
Before launching your campaign, ensure you’ve configured the following settings to align with your campaign objectives and budget.
Campaign time
Choose between continuous or limited campaign duration. If you opt for Limited, specify the start date and end date accordingly.
Budget type
Select daily, weekly, or lifetime budgeting options based on your preference.
Budget
Set your campaign budget based on your advertising goals and financial resources.
Maximum CPC level
Specify the maximum cost per click bid for your campaign.
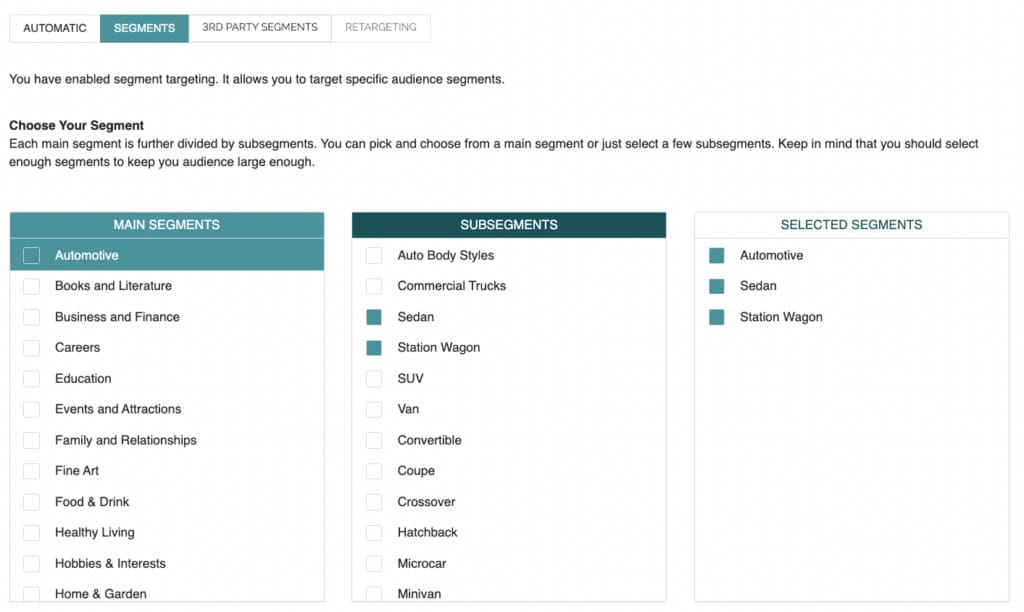
7. Targeting
Choose your targeting strategy to ensure your ads reach the right audience. We offer two options:
Automatic targeting
Let our system automatically optimize your campaign targeting for optimal performance.
Segments
Utilize segments to target specific performance signals for your chosen category.
Budget
Set your campaign budget based on your advertising goals and financial resources.
Maximum CPC level
Specify the maximum cost per click bid for your campaign.
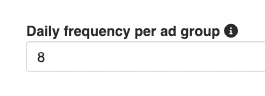
8. Advanced settings
Unlock additional customization options and fine-tune your campaign settings to maximize performance.
Frequency capping
Control the frequency at which ads from an ad group are shown to users within 24 hours.
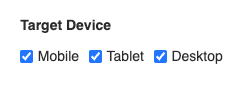
Device targeting
Choose which devices your ads are displayed on: Desktop, mobile or tablet.
Budget spending
Determine how your campaign budget is allocated.
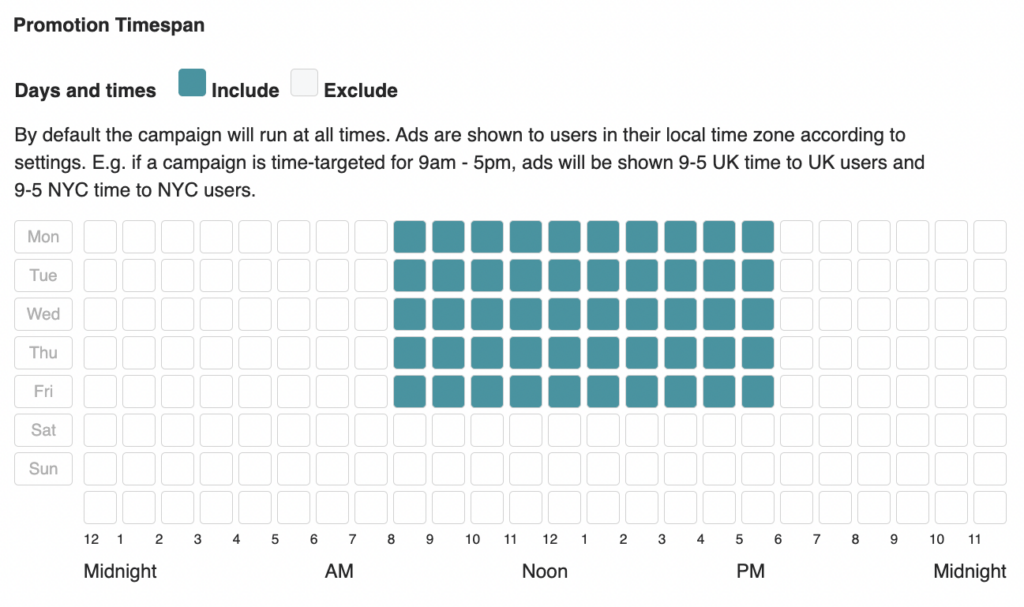
Campaign promotion time span
Schedule your campaign to run on specific days of the week and hours of the day.
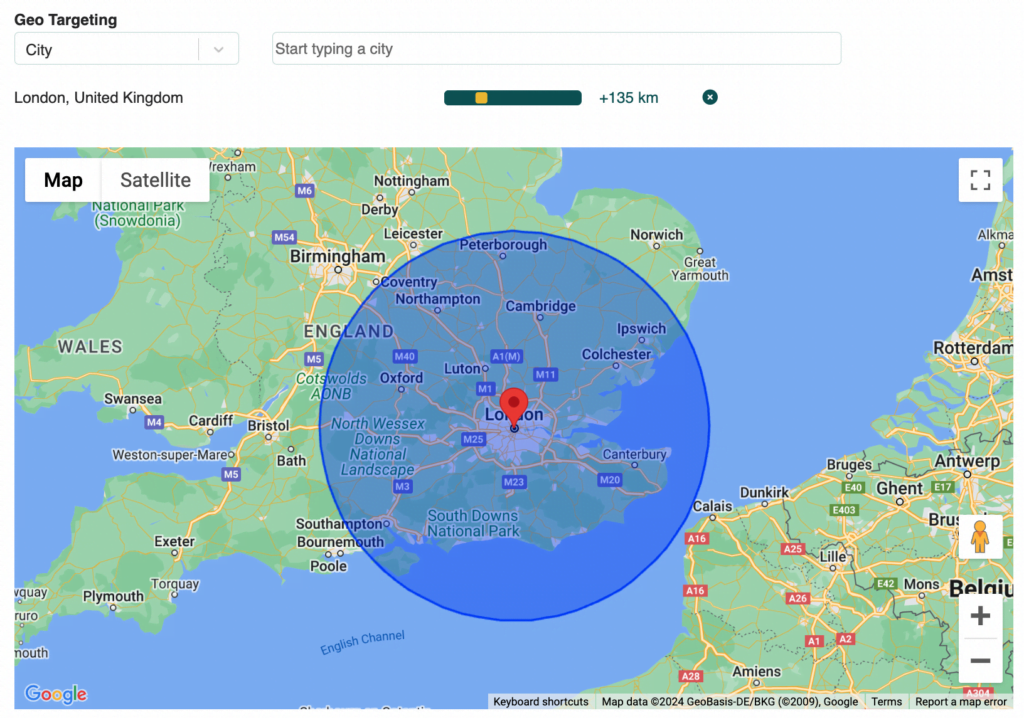
Geo targeting
Target readers based on their location, whether it’s a country, city, region, or zip code.
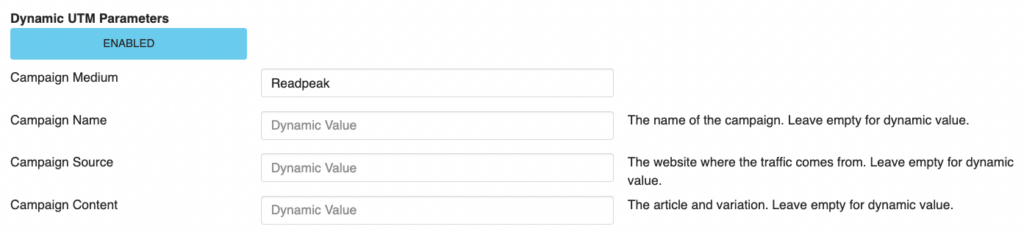
Dynamic UTM parameters for Google Analytics
Enable dynamic UTM parameters to automatically generate UTM parameters for tracking campaign performance in Google Analytics.
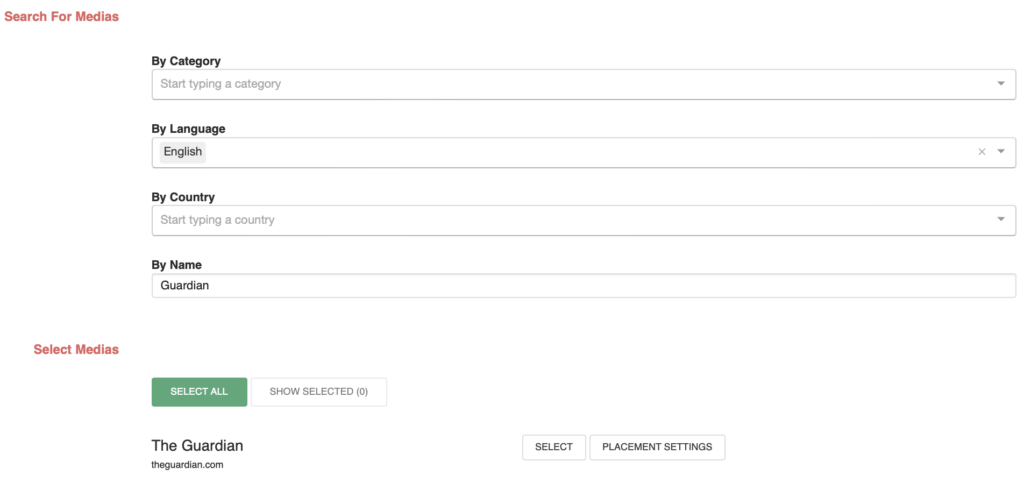
9. Media selection
Choose the perfect publishers and news media outlets to showcase your native ads.
Search and select
Explore a wide range of publishers and news media by filtering them based on category, language, country, or name.
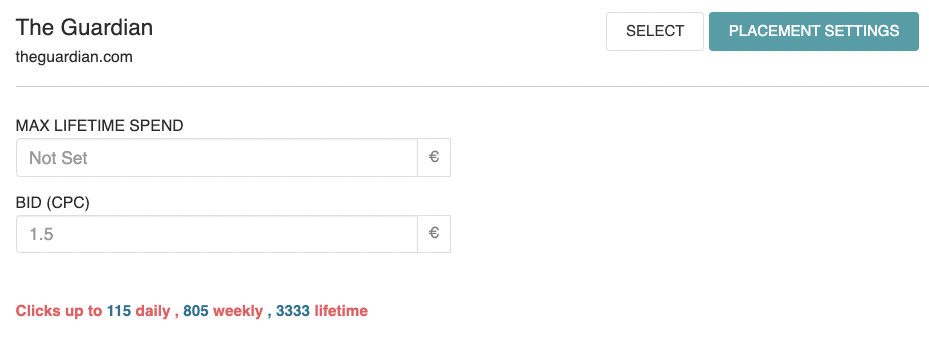
Placement settings
Customize settings for each selected media outlet to optimize your campaign’s performance.
If you have any questions or need help with the setup, reach out to us in the platform chat.